
Managing your business finances without professional guidance can be risky and time-consuming. Whether you’re preparing for tax season, cleaning up bookkeeping errors, or scaling your company, adding an accountant to QuickBooks Online ensures financial accuracy and compliance.

This article is written to help business owners confidently complete the process without confusion.
Why Add An Accountant To QuickBooks Online?
Adding an accountant provides several benefits:
- ✔ Professional financial oversight
- ✔ Accurate tax preparation
- ✔ Clean and reconciled books
- ✔ Financial reporting and insights
- ✔ Audit-ready documentation
- ✔ Reduced compliance risk
Unlike regular users, accountants receive specialized access that allows them to review reports, adjust journal entries, reconcile accounts, and manage tax-related tasks efficiently.
Understanding Accountant Access In QuickBooks Online
QuickBooks Online offers a special role called “Accounting Firm” access. This is different from adding a standard user because:
- Accountants don’t count toward your paid user limit
- They receive access tailored to accounting tasks
- They can manage bookkeeping tools and reports
- They can collaborate directly inside your company file
This access ensures your accountant can work effectively without compromising system security.
How To Add an Accountant to QuickBooks Online
Follow these clear steps:
Step 1: Log In to QuickBooks Online
- Visit the official QuickBooks Online login page.
- Enter your administrator credentials.
- Ensure you are logged in as the Primary Admin or a user with full access rights.
Only users with admin privileges can invite an accountant.
Step 2: Navigate to Manage Users
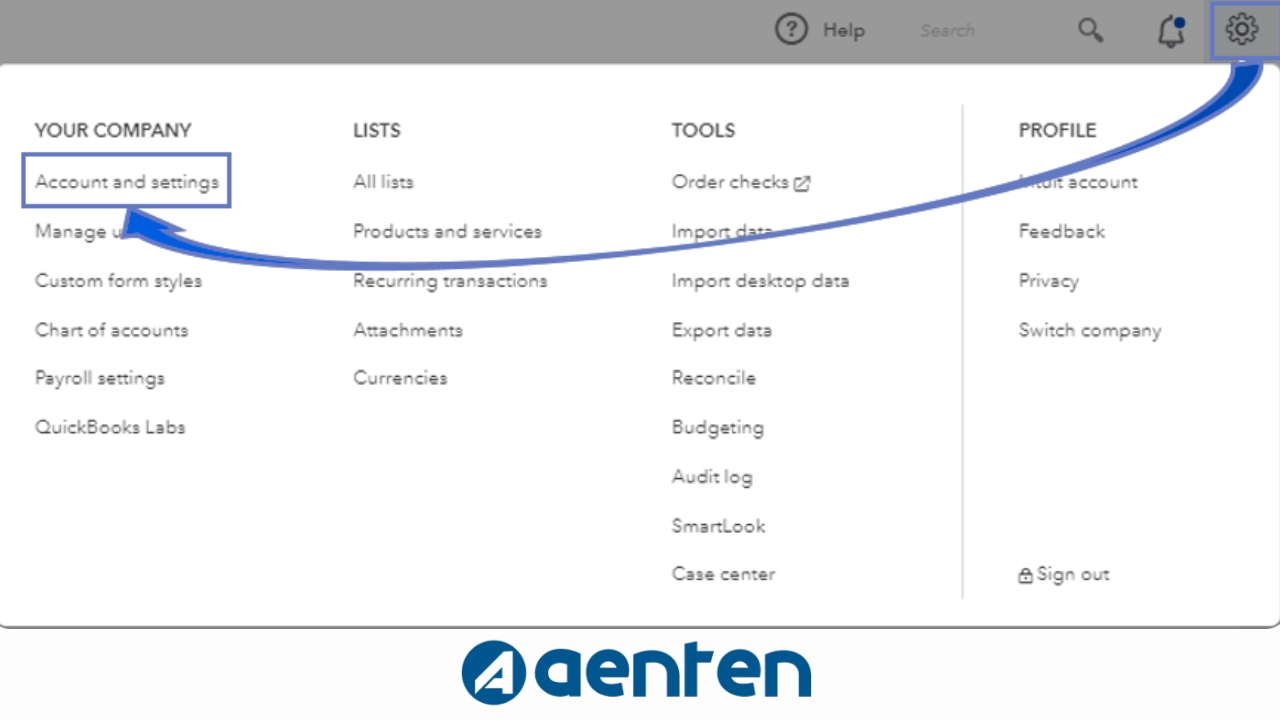
- Click the Gear Icon (⚙️) in the top-right corner.
- Select Manage Users under the “Your Company” section.
- Open the Accounting Firms tab.
This tab is specifically designed for inviting professional accountants.
Step 3: Invite Your Accountant
- Click Invite.
- Enter your accountant’s email address.
- Click Save or Send Invitation.
Your accountant will receive an email invitation with instructions to connect their firm to your company file.
Step 4: Accountant Accepts Invitation
Your accountant must:
- Open the invitation email.
- Click the access link.
- Sign in using their QuickBooks Accountant account.
- Accept the invitation.
Once accepted, they will have full accounting firm access to your file.
What Your Accountant Can Do After Access Is Granted
After successful setup, your accountant can:
- ✔ Review financial statements
- ✔ Reconcile bank accounts
- ✔ Adjust journal entries
- ✔ Prepare tax reports
- ✔ Manage payroll adjustments
- ✔ Access audit logs
- ✔ Provide compliance guidance
This improves collaboration and reduces email back-and-forth document sharing.
Common Problems When Adding An Accountant
Even though the process is simple, users sometimes encounter issues. Below are the most common problems and their solutions.
1: “Invite” Button Not Visible
Cause: You’re not logged in as Primary Admin.
Solution:
- Confirm you have admin-level permissions.
- Ask the Primary Admin to grant access or send the invitation.
2: Accountant Didn’t Receive the Invitation Email
Cause: Spam filters or incorrect email address.
Solution:
- Double-check the email address entered.
- Ask accountant to check spam/junk folder.
- Resend the invitation from the Accounting Firms tab.
3: Invitation Expired
Cause: Invitations may expire if not accepted promptly.
Solution:
- Remove the pending invitation.
- Send a new invitation.
4: Already At User Limit
Standard user limits do not apply to accountants. However, if you accidentally added them as a regular user instead of an accounting firm:
Solution:
- Delete the regular user profile.
- Re-add under Accounting Firms tab.
5: Security Concerns
If you’re worried about sensitive financial access:
Solution:
- Only invite licensed, verified accountants.
- Review audit logs regularly.
- Remove access when services end.
How To Remove An Accountant From QuickBooks Online
If you need to revoke access:
- Go to Manage Users.
- Click the Accounting Firms tab.
- Select the accountant’s name.
- Click Delete or Remove.
Access will be immediately revoked.
Security Best Practices
When granting accountant access:
- ✔ Verify credentials of the accounting firm
- ✔ Use secure business email addresses
- ✔ Enable two-factor authentication
- ✔ Review user activity logs
- ✔ Remove inactive accountant access
Security is essential when sharing financial data.
When Should You Add an Accountant?
You should consider adding an accountant if:
- You are preparing for tax filing
- You need financial cleanup
- You want monthly reconciliations
- You need financial forecasting
- You are applying for loans or investors
- You want compliance assurance
Many small business owners wait until tax season — but ongoing collaboration is often more beneficial.
Benefits Of Adding An Accountant To QuickBooks Online
- ✔ Saves time on bookkeeping
- ✔ Prevents costly tax mistakes
- ✔ Ensures accurate financial statements
- ✔ Improves business decision-making
- ✔ Provides audit-ready reports
- ✔ Reduces stress during tax season
Adding an accountant is not just a technical step — it’s a strategic move for business growth.
Frequently Asked Questions
Does adding an accountant cost extra?
No, accountant access does not count toward your paid user limit.
Can I add more than one accountant?
Yes, you can invite multiple accounting firms if needed.
Can I control what my accountant sees?
Accountants receive full accounting-level access, but not billing or subscription management access.
Can I revoke access anytime?
Yes, access can be removed instantly via the Manage Users section.
Final Thoughts
Adding an accountant to QuickBooks Online is a simple yet powerful way to improve financial accuracy and compliance. By following the step-by-step process outlined above, you can grant secure access without confusion or risk. If you encounter issues such as missing invitations, login problems, or permission errors, troubleshooting steps are straightforward and easy to resolve.
For businesses that want professional assistance, setup optimization, or Ongoing QuickBooks support, Aenten provides expert services to ensure your accounting systems run smoothly and securely.


